Saturday, May 22, 2010

Father's Day Shaped Card using Cricut Holiday Cakes

Well we have all made it to Saturday! I am so glad the week is over.
Today is my monthly post over at Everyday Cricut so when your through here head on over and see the Father's Day gift ideas--Since Dad's big day is less than a month away, I will be showing Father's Day cards from today through next week.
Today's card is intended to go with the picture frame I made and posted on Everyday Cricut.
Photobucket

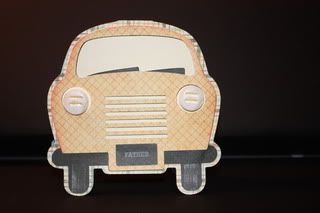
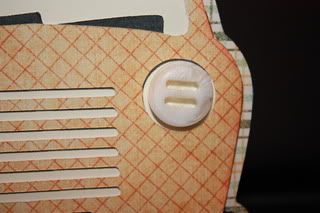
This card is from the new Cricut Holiday Cakes Cartridge. I used the base shadow, copied it on my gypsy and welded it to make a top fold shaped card. I cut the outside with all the layers. It was pretty easy to put together as the shapes layer well.
Photobucket

I added a couple of buttons with unique holes for the headlights. On the tires, I used the distressed stripes stamps from Papertrey Ink for the tires and the mini sentiment sets for the Father on the plate!
Photobucket
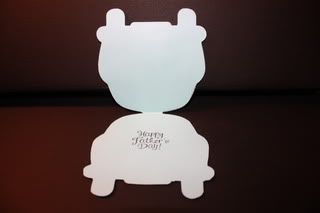
I used a stamp from Michaels for the inside and left plenty of room to write a note or have everyone sign!
Photobucket
So I have a challenge for you all--to use more than one printed paper on your next card. I love mixing patterns, prints, and levels of color. I use a lot of solid card stock as well but pattern play can be a lot of fun!

Make sure to head over to Everyday Cricut and check out the Father's Day gift ideas! Have a great weekend!

Friday, May 21, 2010

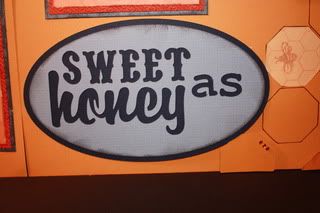
Sweet as Honey using Cricut Just Because Cards Cartridge

YEAH--it's friday! Hope you all had a great week. I am so excited about today's layout I almost showed it to you all yesterday. I want to make sure to give credit where it is due and the idea for the honeycomb cut out did not come from me but I have added my personal touch to it.
Photobucket

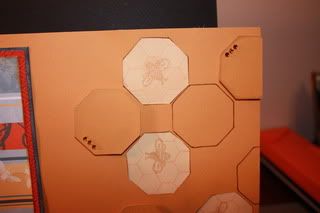
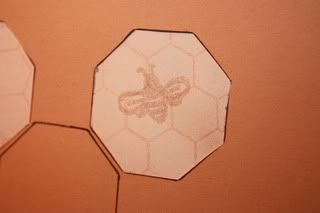
Double layout where I used the Cricut Just Because Cards Cartridge for the sentiment and the honey pot and I used Cricut George for the octagon. I used my gypsy to place the cuts for the honeycomb and then used one of the scraps to trace the rest to form the pattern.

Photobucket

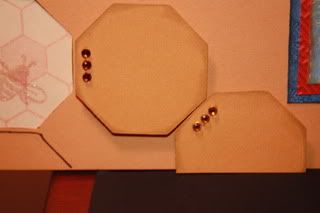
I the detail shots below you can see where I used a CTMH bee stamp and used clear embossing powder and my heat gun to finish off the bees. I added two tones of yellow bling because everything is better with a little bling! All of the sections that have bling are also pop dotted to add some 3D effects. I love my cat eye chalk ink so i used them there as well.
Photobucket

Photobucket

The honey pot was cut at 15", yes 15". Because the items on this cartridge(for the most part) cut in relation to the size of the card--I had to play with it a bit-

Photobucket

I used the stencil and stencil shadow for the sentiment and it was cut at 4". Of course I inked this cut as well.
Photobucket

I used a triple layer photo mat for 4X6 inch photos. I added a 1/4" to each layer (4 1/4" x 6 1/4" for the top mat add 1/4" for each additional layer). I used two prints and a solid middle layer that I sent through the cuttlebug using the screen folder from the asian bundle and a little chalk ink.
Photobucket

Hope you enjoyed this layout--I love the way it turned out! Don't forget to check out Everyday Cricut in the morning as I have a few fun Father's Day items to share!
Have a great day!

Thursday, May 20, 2010

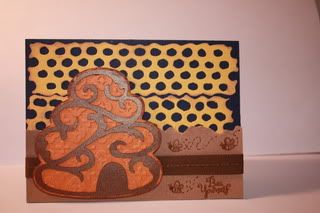
Bee Hive Card using Cricut Sentimentals Cartridge

One day closer to the weekend!!!!! Today I have a card that I made using my cuttlebug to cut rather than emboss.
Photobucket
I found a great deal on a die at Oh My Crafts for next to nothing and thought it would be perfect for this group of projects. I sent them through the sticker maker to make it easier to attach to the card base.

Photobucket
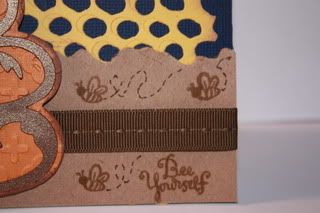
I cut the bee hive from the Cricut Sentimentals Cartridge. I cut the shadow in a rich orange color and sent it through the cuttlebug to add texture. I cut the base base cut in a scrap of brown shimmer card stock which I think adds a little bling but not to much!

Photobucket
I added a strip of ripped kraft card stock along the base to allow for a grounding layer. I used some deep brown ribbon and the same CTHM stamp set I used yesterday. As I looked at the finished card, or what I thought was finished, i thought there was something missing--and I decided that it was the buzz lines that were missing--used a brown marker to add them in!

I have been making a lot of cards lately and this has to be one of my top 10. It's not perfect but it is unique!
I have a great two page layout to share with you to round out the week. Don't forget to check out Everyday Cricut this saturday for some great Father's Day treats!

Wednesday, May 19, 2010

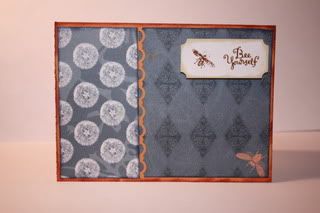
Bee Yourself Card

We have made it to Wednesday and I have a super simple card today. I am still using the same papers from yesterday's video.

Photobucket

It is simply two cutes on my paper trimmer. I wanted to break the two blue papers up so I took a scrap of paper and punched it with the SU edge punch. I used the EK Success punch that I showed in yesterday's video for the tag. The stamp set us from CTMH and was the small set on the back of the first book this year. Simple and fast!

Thursdays card is a keeper and Fridays layout makes me smile--see you in the morning

Tuesday, May 18, 2010

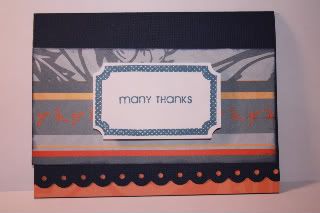
Super Simple Card and "Budget Friendly Buys" Video

Tuesday is here and I am on a plane to Chicago to meet with a customer--up and back in the same day is a killer trip but I have to finish my projects for this weekend on Everyday Cricut--LOL!
Today I have a super simple card and a fun little video which I hope you will enjoy!
First the card-
Photobucket

This card took 10 Minutes to make! I used a sheet of navy card stock I had on hand and cut the printed stripe paper to fit. I inked the edges and applyed to the card face with my ATG gun. I then used the Fillable Frames #1 stamp set and die from Papertrey Ink and some Ranger ink to stamp and cut the center sentiment. To jazz up the bottom, I used a Fiskers edge punch along the bottom. This was a last minute add--when this happens I mark the center of my card so I can line it up with the center of my punch, make my first punch here and work my way to the edge. This help keep the sides even (looks like my measurements were just a smidge off--goes to show no one is perfect!) A card like this is perfect when your in a pinch or a masive time curnch!

Now on to the video--I wanted to share some of my budget friendly tips with you--


Thanks for stopping in today--I have really fun card to share with you in the morning! Make it a great one!

Monday, May 17, 2010

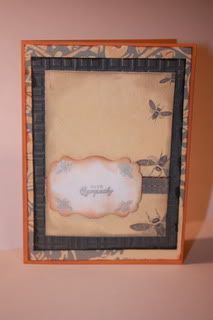
Layered Sympathy Card

Here we are at the start of another week. I will be sharing projects this week using a selection of papers and tools that are budget friendly! I will have a paper review on Tuesday and my goal is to show that you can make a number of projects with the same papers that all have very different feelings.
Today I have a sympathy card.
Photobucket
I used a number of layers and a unique orange and grey color combo. I added some texture to the solid grey layer using the Cuttlebug and folder from the Asian bundle.

Photobucket
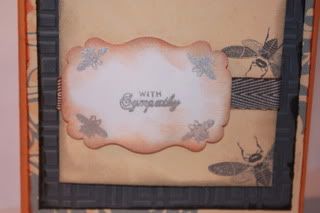
Using a EK Success punch, I made a 'top note' of sorts and stamped the sentiment using a Papertrey Ink stamp and the bees from an SEI set. I inked the edges twice--once with a close match orange shade and then over inked that with a dusty grey. I added some herringbone twill tape I had in my ribbon bucket.

Photobucket
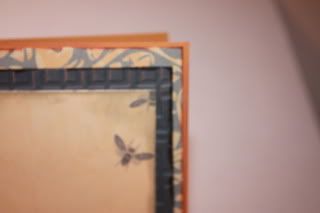
Here is a close up of the layers--you can also do a lot with planning the placement of the printed paper--since I was using a paper that had a border print I made sure that you could still see the grey bees which tie the color combo together.

***Update--I have heard your comments about the black type face in the comments and it being hard to read--I did my research and found out how to change it and it should now match the text color of the main post--much easier to read and enjoy eveyone's comments--thanks for the feedback and hope you like the update!

Thanks for stopping by. I usually one post on Monday Wednesday and Friday but this week I have something to share everyday! This weekend crafting came before laundry--
Have a great day!

Sunday, May 16, 2010

New Look, New projects, same ol ScrapGuy..

Hope everyone is having a wonderful Sunday. Now that I have been blogging for about 6 months--it was well past time for a blog lift. Since computers and I have been known to have it out I thought it best to turn to some experts. Joy pointed me to the sight that I found the background on (see bottom of page for link). I found it hard to find something that was not pink and full of flowers!! LOL.
I also turned to Diana from Custom Blog Designs for help with the button and signature. Talk about fast--I put my order in on Friday night (late evening) and it was complete in 48 hours! I think they both came out great. She also does custom layouts and blog lifts--make sure to check her out!

I have some great projects lined up this week and I am busy working on my Saturday post for Everyday Cricut which I am super excited about!

Hope you like the new look!
See you on Monday
 
Designed by Lena Graphics by Melany