Friday, November 12, 2010

Gift Bucket with canvas tag

Well here is the last project I have to show you from the make and takes from my trip to Archivers.
This one was so cute!
We added a strip of paper to the inside and a paper pinwheel to the top.  On the handle we added three tags
I really loved these canvas tags
You can stamp them, ink them, glimmer mist them, and so much mores--
I bought two packs for later use
Each pack of 4 tags cost about $2.45--I can't wait to use these
Make it a great one

Thursday, November 11, 2010

Card using looped ribbon

Hello everyone--to days card from the Archivers make and take is super simple but taught me a technique I did not know before
The tree is embossed and I stamped the sentiment.  The bracket edge is using a Tim Holtz die and the ribbon at the bottom is looped by taking the Tim Holts tiny attacher and placing a staple between each loop.
You all may already have this tool but I think it a must have for any crafter>
It's called a quick stick-one end is sticky the other gives you to have an extra long skinny finger to help attach this titty bitty pcs to your project.  For six bucks I had to have one.
Make it a great one?

Wednesday, November 10, 2010

Archivers Clear Tag Make and Take

Happy Wednesday---Hope you all are well.  While I was in Kansas City this past weekend--My mother and I went to Achievers for there big make and take weekend.  We used lots of new product (new to us) and had a blast
One project was this great tag using clear acrylic some ribbon and some Coordination's high UV printed paper!
First step was to send this acrylic through the cuttlebug using one of the Tim Holtz folders.  Once that was done--on the debossed side (which will be the back of the tag) take one of the pant dabbers, in this case we used white,  and inked the back.  You want to be sure to hit the holes really to get the best effect possible.  Once you done with that wipe to excess off with a paper towel.  We used a rounded rectangle hole punch to thread the ribbon through.
The trees are just triangles cut from some very cool Coordination's what is white printed with a HIGH UV finish--this allows you to ink and wipe away and still see the amazing effect. I bought some of this dot paper and well as two sheets for snowflakes!  They were a bit expensive (almost 2 bucks a sheet) but well worth it!
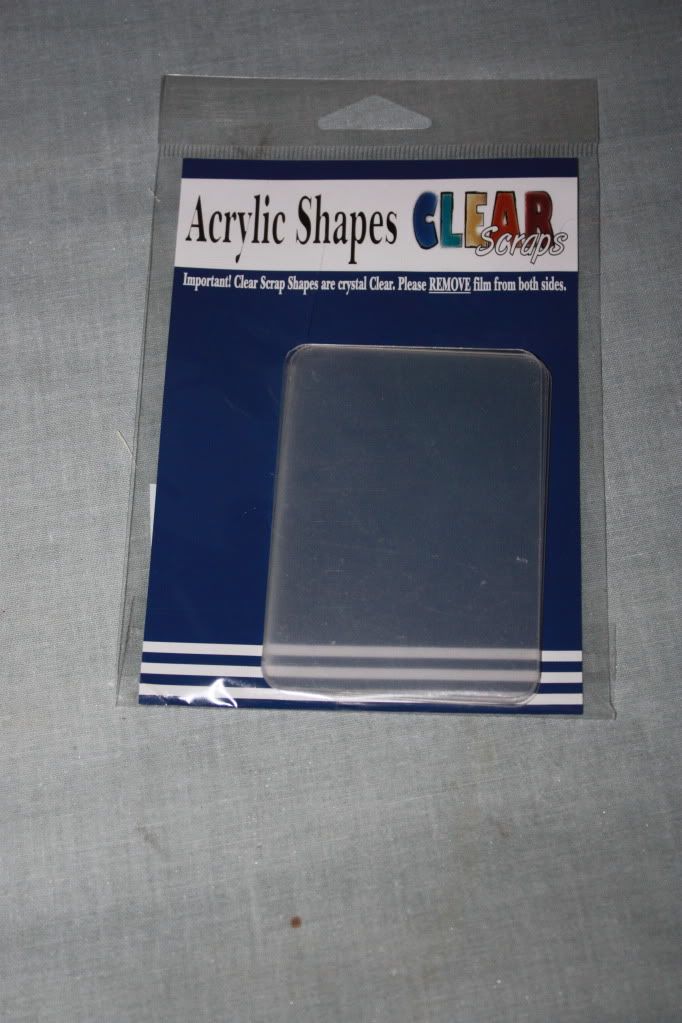
Here is what the clear acrylic looks like in the package--it was around 4 bucks bit.  I have so many ideas for this stuff--I can't wait to use it.
Thanks for stopping in a remember to make it a great one.

Monday, November 8, 2010

Simple Thank You Z-fold card

It's Monday and I am home in Dallas--there is nothing like sleeping in your own bed. 
Here is a simple Z fold card I made this weekend--the paper is DCWV Fall stack. 
The sentiment is from the Bountiful Blessings stamp collection from the Pink Cricut (Sarah).  These mocha pearls match the copper printing perfectly!!!!!  A little faux stitching to finish off the outside.
On the inside of the Z fold I placed a cream sheet of paper cut to fit and added another stamp from the same collection and plenty of space to write a message.

Hope you liked this simple card--I will announce the winner of the stamp set from the Thankful blog hop this weekend!  Welcome to all the new followers--I am so looking forward to sharing with you all! 
This week is crazy busy!  I went to Archivers this weekend and did the make and takes and bought way to  much stuff--that I have to share cause I think you all will want some of it! Check back on Tuesday for a super cute treat holder for the holiday season!
Make it a great one
 
Designed by Lena Graphics by Melany